Taking Control: Advanced Methods for Disabling Your Chromebook's Touchscreen
You’re trying to focus, get work done, or simply avoid those phantom touches, and your Chromebook's touchscreen keeps getting in the way. Whether it’s an accidental tap derailing your workflow, a hardware glitch causing spurious inputs, or a security concern, taking full control means knowing how to selectively disable this interactive feature. While many users are familiar with basic accessibility settings, this guide dives deep into the more advanced methods for disabling the touchscreen via Chrome OS Flags or Developer Mode, giving you the granular control you truly need.
This isn't about simply ignoring the screen; it's about actively turning off the touch interface when it's more of a hindrance than a help. We’ll explore two powerful, albeit distinct, approaches that let you reclaim your Chromebook experience.
At a Glance: Key Takeaways for Disabling Your Touchscreen
- Why disable? Prevent accidental taps, solve phantom touch issues, enhance focus, or address security concerns.
- Two main paths: Chrome Flags (simpler, no data wipe, temporary) or Developer Mode + Crosh (complex, requires data wipe, potentially persistent but more involved).
- Chrome Flags (
chrome://flags): Use the "Debugging Keyboard Shortcuts" flag to enable a quickShift + Search + Ttoggle. Experimental and might change. - Developer Mode + Crosh: A more robust but riskier method. It involves a full device wipe ("Powerwash") and requires command-line interaction (
xinputcommands) in Crosh. Changes might not persist across reboots without further scripting. - Crucial Warning: Enabling Developer Mode erases all data on your Chromebook. Back up everything before you start.
- Alternatives: Consider adjusting touch sensitivity or using a screen protector before a full disable.
Why Disable Your Chromebook Touchscreen? More Than Just Annoyance
Before we delve into the "how," it's worth understanding the "why." While touchscreens offer an intuitive way to interact with your device, there are compelling reasons to opt out, even temporarily.
Many users find themselves wrestling with:
- Accidental Taps and Gestures: In a cramped workspace, or when simply resting your hand near the screen, unintended inputs can disrupt your work or cause frustration. A quick tap can close a tab, open an app, or trigger an unwanted action.
- Phantom Touches or Ghost Inputs: This is a common hardware issue where the touchscreen registers "touches" that aren't actually happening. It can be caused by physical damage, manufacturing defects, or even static electricity. Disabling the screen entirely is often the most effective workaround.
- Enhanced Focus and Productivity: For writers, coders, or anyone who primarily uses a keyboard and mouse/trackpad, the visual and haptic cues of a touchscreen can be a distraction. Turning it off creates a more dedicated, keyboard-centric environment.
- Security and Privacy Concerns: In some shared or public environments, disabling touch interaction might be a preference to limit potential unauthorized access or interaction with sensitive data, especially when stepping away momentarily.
- Specific Use Cases: If your Chromebook is connected to an external monitor and used as a desktop replacement, or docked in a way that makes the touchscreen awkward to use, disabling it can streamline your setup.
Understanding your motivation helps determine which advanced method best suits your situation – a temporary toggle or a more permanent solution.
Method 1: Toggling Touch with Chrome Flags – The Less Disruptive Path
Chrome Flags are experimental features that Google is testing. They live deep within your browser's settings, offering powerful customization options that aren't yet ready for the mainstream. Using flags to disable your touchscreen is generally simpler than Developer Mode and, crucially, doesn't require wiping your device. However, precisely because they are experimental, flags can change, disappear, or behave inconsistently.
This method is ideal for those seeking a quick, reversible toggle without the drastic steps associated with Developer Mode.
Step-by-Step: Enabling the Debugging Shortcut
- Open Chrome Browser: Start by opening the Google Chrome browser on your Chromebook. This is where all flag-related adjustments happen.
- Navigate to Flags: In the address bar, type
chrome://flags/#ash-debug-shortcutsand press Enter. This direct link takes you straight to the relevant flag, saving you from sifting through hundreds of options. - Enable the Flag: Locate the "Debugging Keyboard Shortcuts" flag. It will likely be highlighted due to the direct URL. Click on its dropdown menu and select 'Enabled'.
- Restart Your Chromebook: A 'Restart' button will appear at the bottom right of your screen. Click it. Your Chromebook needs to reboot for the flag changes to take effect.
- Toggle the Touchscreen: Once your Chromebook has restarted, you can now use the shortcut: press
Shift + Search + Tsimultaneously on your keyboard. This combination will immediately disable the touchscreen. - Re-enable as Needed: To bring your touchscreen back to life, simply press
Shift + Search + Tagain. It acts as a convenient toggle switch.
An Alternative (and Less Reliable) Flag
While the ash-debug-shortcuts flag is generally the go-to for a quick toggle, some users have experimented with another flag, though its effectiveness is less consistent across devices and Chrome OS versions:
- Go to
chrome://flags: Type this into your browser's address bar and press Enter. - Search for "Touch Events": Use the search bar at the top of the flags page to find flags related to touch input.
- Modify "Touch Events API": Locate the "Touch Events API" flag and set its dropdown to 'Disabled'.
- Restart: As before, restart your Chromebook for changes to apply.
- Revert: To re-enable, set the flag back to 'Enabled' or 'Default' and restart.
Important Note on Flags:
Remember, Chrome Flags are subject to change. Google can modify them, remove them, or alter their functionality with any Chrome OS update. If this method stops working for you in the future, it's likely due to an update. Always proceed with caution when enabling flags, as some can impact system stability. For a more in-depth look at managing your device's core input, you might find value in exploring methods to turn off your Chromebook touchscreen through various approaches.
Method 2: Developer Mode and Crosh Terminal – The Advanced, Persistent (and Risky) Path
This method offers a deeper level of control but comes with significant prerequisites and risks. It's not for the faint of heart or those unwilling to back up their data. Enabling Developer Mode fundamentally changes your Chromebook's operating state, prioritizing user control over out-of-the-box security features.
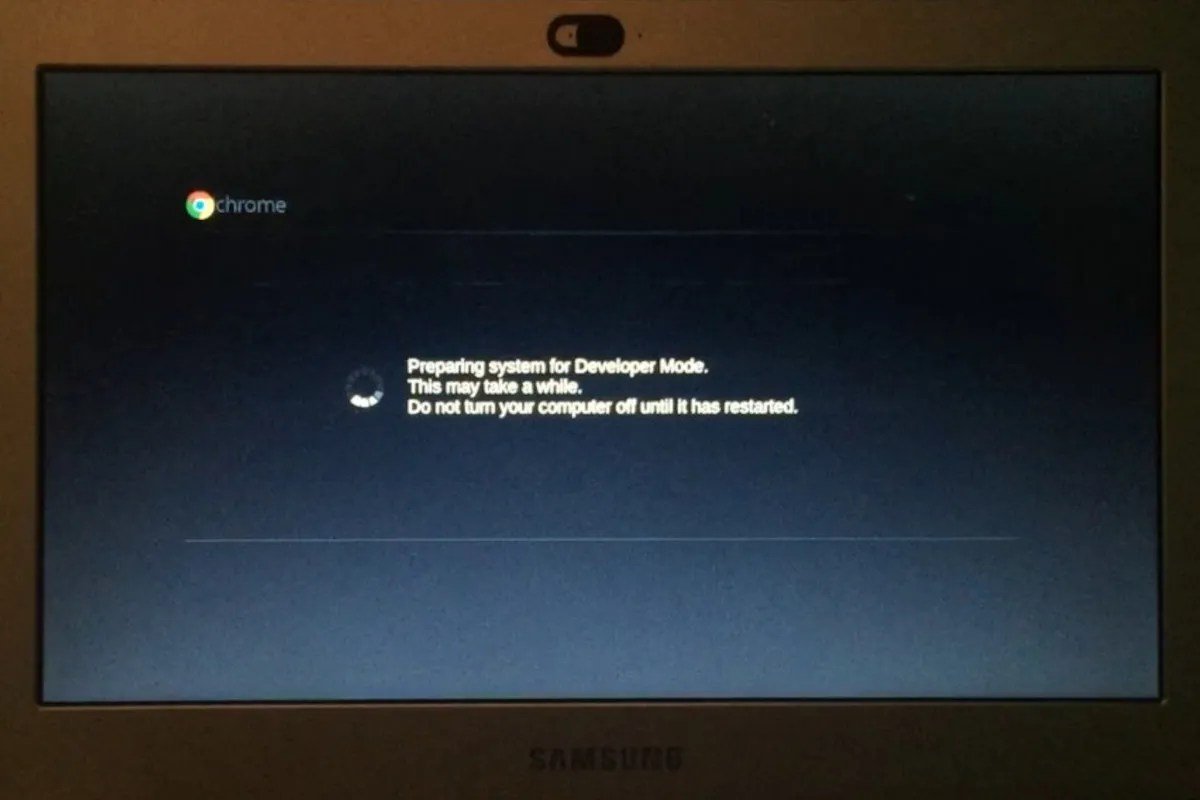
CRITICAL WARNING: Prepare for a Powerwash!
Enabling Chrome OS Developer Mode is a drastic step. It performs a "Powerwash," which completely erases all user data from your device's internal storage. This includes downloaded files, stored passwords, cached data, and anything not synced to Google Drive.
Before you even consider this method, ensure you have backed up every single essential file to Google Drive, an external hard drive, or another cloud service. You will lose everything else.
Developer Mode also reduces some of the built-in security protections of Chrome OS, as it allows for greater system modification. Only proceed if you understand and accept these implications.
Step-by-Step: Diving into Developer Mode and Crosh
- Enable Chrome OS Developer Mode:
- Backup First: Reiterate: Back up all your data now.
- Initiate Recovery Mode: Turn off your Chromebook. Then, hold down
EscandRefresh(the circular arrow key above '3') keys, and while holding them, press thePowerbutton. - Follow On-Screen Instructions: Your Chromebook will boot into Recovery Mode. You'll see a screen that likely says "Chrome OS is missing or damaged." Don't panic; this is normal.
- Press
Ctrl + D: At this screen, pressCtrl + D. This will bring up a prompt asking if you want to turn OS verification off. - Confirm: Press Enter to confirm that you want to disable OS verification. This action initiates the Powerwash and reboots your device.
- Wait: The Powerwash process can take several minutes. Your Chromebook will restart multiple times and may display a warning screen on startup (saying "OS verification is OFF"). Let it complete the setup process as if it were a brand new device.
- Bypass Warning (Optional): Each time you start your Chromebook in Developer Mode, you'll see a warning screen. You can usually press
Ctrl + Dor wait a few seconds to boot into Chrome OS.
- Open the Crosh Terminal:
- Once your Chromebook has fully restarted and you've logged in, open Crosh (Chrome Shell) by simultaneously pressing
Ctrl + Alt + T. This will open a new browser tab with a command-line interface.
- Access the Shell:
- In the Crosh terminal, type
shelland press Enter. This command grants you access to a more powerful Linux-like command line.
- Identify the Touchscreen Device:
- To disable a specific input device, you first need to know its exact name or ID. Type
xinput listand press Enter. - This command will display a list of all detected input devices (keyboard, mouse, touchpad, touchscreen, etc.). Look for an entry that clearly identifies your touchscreen. Common names include "touchscreen," "Goodix Touchscreen," "ELAN Touchscreen," or something similar. Note down its exact name (including capitalization and spaces) or its numerical ID.
- Example output snippet:
⎡ Virtual core pointer id=2 [master pointer (3)]
⎜ ↳ Virtual core XTEST pointer id=4 [slave pointer (2)]
⎜ ↳ Goodix Touchscreen id=12 [slave pointer (2)]
⎜ ↳ ELAN Touchpad id=10 [slave pointer (2)]
⎣ Virtual core keyboard id=3 [master keyboard (2)]
In this example, "Goodix Touchscreen" withid=12is our target.
- Disable the Touchscreen:
- Now, use the
xinputcommand to disable the device. - Using the device ID: Type
xinput set-prop [device-id] "Device Enabled" 0(replace[device-id]with the ID you found, e.g.,xinput set-prop 12 "Device Enabled" 0). - Using the device name: Type
xinput disable 'touchscreen'(replace'touchscreen'with the exact name you found, e.g.,xinput disable 'Goodix Touchscreen'). Make sure to use single quotes if the name contains spaces. - Press Enter. You won't usually get a confirmation message, but the touchscreen should stop responding immediately.
- Reboot (Optional but Recommended):
- While the change should be immediate, rebooting your Chromebook (
sudo reboot) can help ensure the setting is applied consistently.
- To Re-enable the Touchscreen:
- If you wish to re-enable it, simply open Crosh (
Ctrl + Alt + T), typeshell, and then use thexinput enablecommand: xinput enable 'touchscreen'(orxinput set-prop [device-id] "Device Enabled" 1if using the ID).
Important Considerations for Developer Modexinput:- Temporariness: The
xinput disablecommand is often temporary. This means that after a full shutdown and restart (not just a sleep), your touchscreen may re-enable itself. For a persistent disable, you would need to configure a startup script to run thexinput disablecommand every time Chrome OS boots. This is an even more advanced topic, requiring knowledge of shell scripting and Chrome OS boot processes, and is beyond the scope of this particular guide. - Device Compatibility: This method may not work on all Chromebook models, especially newer ones with highly integrated hardware where
xinputmight not fully manage the touch controller. - Security Implications: Running in Developer Mode leaves your device more vulnerable to tampering, as OS verification is off. Be mindful of what you install or connect to your Chromebook.
- Updates: Chrome OS updates can sometimes reset Developer Mode, requiring you to go through the Powerwash process again.
Choosing Your Path: Flags vs. Developer Mode
Deciding between Chrome Flags and Developer Mode depends entirely on your comfort level, your needs, and your willingness to accept trade-offs.
| Feature | Chrome Flags (chrome://flags) | Developer Mode + Crosh (xinput) |
|---|---|---|
| Complexity | Relatively simple | Advanced, requires command-line interaction |
| Data Wipe | No data wipe | Requires full data wipe (Powerwash) |
| Reversibility | Easy to toggle, easy to revert flag | Easy to re-enable, but disabling is temporary |
| Persistence | Toggle often resets on reboot (sometimes persists) | Command is temporary, often resets on reboot |
| Security Impact | Minimal (flags are browser-level) | Significant (OS verification disabled) |
| Ease of Use | Set flag, use keyboard shortcut (Shift+Search+T) | Enable Dev Mode, open terminal, type commands |
| Target User | Anyone needing a quick, low-risk, temporary solution | Advanced users comfortable with risks & CLI |
| "Phantom Touch" Fix | May not fully resolve if hardware-level issue | More likely to resolve by completely disabling |
| Updates | Flags can disappear or change with updates | Developer Mode might be reset by major updates |
| When to choose Flags: |
- You want a quick, temporary disable.
- You don't want to lose any data.
- You're uncomfortable with command-line tools or system-level changes.
- You just need to prevent accidental touches.
When to choose Developer Mode + Crosh: - You've exhausted simpler options, and the touchscreen is unusable due to phantom touches.
- You need a more definitive (though potentially temporary per boot) disable.
- You are comfortable with a full data wipe and working in a command-line environment.
- You understand and accept the security implications.
Before You Dive In: Important Considerations
Completely disabling your touchscreen is a significant step. Before you commit, pause and consider a few alternatives or best practices.
- Adjusting Touch Sensitivity: Some Chromebooks offer settings to adjust touchscreen sensitivity. While not a disable, reducing sensitivity can often mitigate accidental touches without sacrificing the functionality entirely. Check your Chromebook's "Settings" under "Device" or "Accessibility" for any such options.
- Screen Protector: A thick matte screen protector can sometimes help reduce ghost touches if they are caused by minor static or certain environmental factors. It also adds a layer of protection against physical damage.
- Regular Backups: Regardless of whether you use Developer Mode, maintaining regular backups of your important data to Google Drive is a fundamental best practice for any Chromebook user. It ensures that if something goes wrong (hardware failure, accidental Powerwash, etc.), your crucial files are safe.
- Understand the "Why": Revisit why you want to disable it. Is it truly a permanent need, or a temporary fix for a specific problem? This will guide your method choice.
Troubleshooting & What Ifs
Even with clear instructions, things can sometimes go awry.
- Flag Isn't Working:
- Double-check: Did you set the "Debugging Keyboard Shortcuts" flag to 'Enabled' and restart your Chromebook?
- Updates: Chrome OS updates can remove or change flags. If it stopped working after an update, the flag might have been deprecated.
- Alternative Flag: Try the "Touch Events API" flag (Method 1, Alternative), though it's less reliable.
xinput listDoesn't Show Touchscreen:- This is rare, but if your touchscreen isn't listed, it might be due to a highly integrated proprietary driver not exposed via
xinputor a hardware issue that makes the device undetectable at the OS level. In such cases, this method won't work. xinput disableCommand Not Working:- Exact Name/ID: Did you use the exact device name (case-sensitive, with spaces in quotes) or the correct numerical ID?
- Permissions: Are you in the
shell(typedshellafterCtrl+Alt+T)? You need those permissions. - Temporariness: Did you reboot and the touchscreen came back? This is expected behavior for
xinputwithout a persistent startup script. - Can't Exit Developer Mode:
- To exit Developer Mode and return to the standard, secure Chrome OS, you typically have to enable OS verification again. This involves another Powerwash. On the "OS verification is OFF" startup screen, press the Spacebar (or follow the on-screen prompt). Confirm the action, and your Chromebook will reset to factory defaults, wiping all data again.
Reclaiming Your Chromebook: Final Thoughts and Next Steps
Taking control of your Chromebook's touchscreen, whether for focus, troubleshooting, or personal preference, is entirely within your grasp using these advanced methods. You've learned about the quick, experimental toggle through Chrome Flags and the more profound, albeit disruptive, control offered by Developer Mode and the Crosh terminal.
Your next step is to carefully weigh the pros and cons of each method against your specific situation. If a quick, reversible fix for accidental taps is your goal, the Flags method is likely your best bet. If you're battling persistent phantom touches and are prepared for a data wipe, Developer Mode offers a more robust (though temporary without advanced scripting) solution. Always prioritize your data backup, especially when venturing into Developer Mode.
Remember, the power of Chrome OS lies in its flexibility. Knowing how to leverage these advanced configurations empowers you to tailor your device to your exact needs, transforming potential frustrations into a truly customized and productive experience.